OCA – Digital Photographic Practice
Project 1: Workflow – Exercise 1: Your own workflow (1)
The aim of this exercise was to devise and put into practice a workflow that suited me for a specific short assignment. The assignment has to be a portrait session, which will be time limited and a suitable location sourced to meet the criteria stated.
I planned to take various portrait photographs outside in a wooded area of Peterborough called Ferry Meadows. This was completed on Saturday 12th February 2011 within a 15 minute time period. The equipment chosen was a Nikon D300 camera, with a 50mm f1.4 Nikon lens, shooting in aperture priority mode.
Select Equipment → Travel to Ferry Meadows → Go to location → 15 minutes of photography → Edit in camera
The time taken actually photographing was approximately 10 minutes, staying within the time frame that had been planned. The weather was a mixture of cloud and sunlight, with a small amount of wind speed. The total amount of photographs taken was 67, and 21 of these were edited and deleted during the shoot. This left a total number of 46 images to view and edit from home. The images were all taken with an ISO of 200 and an aperture of f2.
The 36 images were downloaded to my PC on Sunday 13th February direct from the camera. These images were then viewed using Adobe Bridge software and 6 images (13, 18, 36, 39, 43 and 45) were chosen to edit in Adobe Photoshop CS5.
Download images to PC → View images on Bridge → Select Images to possibly edit on CS5
The six images chosen to edit are below:


During the editing process I used Raw software on auto mode and then opened each image within Adobe CS5. Once opened in Adobe CS5, I looked at the possibility of cropping and then used mainly Levels and Black & White.
Adobe CS5 → Contrast → Levels → Brightness → Minor adjustments if needed
The four images that I edited, but not selected:


After following the workflow set out at the beginning of this exercise, I have ended up with
the following two photographs:


By planning the workflow in to various elements at the beginning, it has helped to structure the photographic sequence and resulted in two photographs that I’m happy with. The workflow that I used I found to be suitable for what I set out to do.
The most difficult element was the actual processing of the photographs, as this was my first attempt at a portrait session.
DPP Exercise 2
OCA – Digital Photographic Practice
Project 1: Workflow – Exercise 2: Your own workflow (2)
The aim of this exercise was to devise a particular workflow for a specific shooting assignment. Exercise 2 differentiated itself from exercise 1, in that the assignment should be unstructured and open-ended.
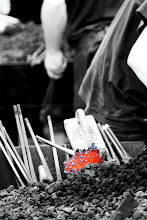
I planned to take various street photographs in Cambridge City Centre on Saturday 5th February 2011 within a 1 hour time period. The equipment chosen was a Nikon D300 camera, with a 50mm f1.4 Nikon lens, shooting in aperture priority mode.
Select Equipment → Travel to Cambridge → Go to location → 1 hour of photography → Edit in camera
The time taken actually photographing was 1 hour, staying within the time frame that had been planned. The weather was cloudy and overcast, with a higher than normal wind speed. The total amount of photographs taken was 76, and 40 of these were edited and deleted during the shoot. This left a total number of 36 images to view and edit from home. The images varied in exposure and subject matter.
The 36 images were downloaded to my PC on Sunday 6th February direct from the camera. These images were then viewed using Adobe Bridge software and 6 images (3, 9, 12, 15, 23 and 27) were chosen to edit in Adobe Photoshop CS5.
Download images to PC → View images on Bridge → Select Images to possibly edit on CS5
The six images chosen to edit are below:


During the editing process I used Raw software on auto mode and then opened each image within Adobe CS5. Once opened in Adobe CS5, I looked at the possibility of cropping and then used mainly Levels and Black & White.
Adobe CS5 → Cropping → Levels → Black & White → Minor adjustments if needed
The four images that I edited, but not selected:


After following the workflow set out at the beginning of this exercise, I have ended up with the following two photographs.


By planning the workflow in to various elements at the beginning, it has helped to structure the photographic sequence and resulted in two photographs that I’m happy with.
The most difficult element was the actual photography in Cambridge, followed by the processing on Adobe CS5 and deciding on the various options within this software application before being happy with the final photographs.
OCA – Digital Photographic Practice
Project 1: Workflow – Exercise 3: Histogram
The purpose of this exercise was to increase my familiarity with histograms by relating each one to the image that I have just taken.
I planned to take the photographs needed at Ferry Meadows in Peterborough on Saturday 12th February 2011. The equipment chosen was a Nikon D300 camera, with a 50mm f1.4 Nikon lens, shooting in aperture priority mode.
Select Equipment → Travel to Ferry Meadows → Go to location → Set up Equipment → Photography
The time taken actually taking photographs was approximately 5 minutes, after setting up a tripod and camera in the chosen location. The weather was a mixture of cloud and sunshine. The total amount of photographs taken was 9 and these were not edited in any way. The images were all taken at ISO 200 and f1.4.
The 36 images were downloaded to my PC on Sunday 13th February direct from the camera.
Download images to PC → View images on Bridge → Screen save Images to Word document
The completed images show average, high and low contrast and dynamic ranges, with the high contrast images having the histogram spread right across the graph to the far edges.
The low contrast images show the histogram squeezed more towards the centre of the graph. There is no evidence of shadow clipping with these series of photographs.